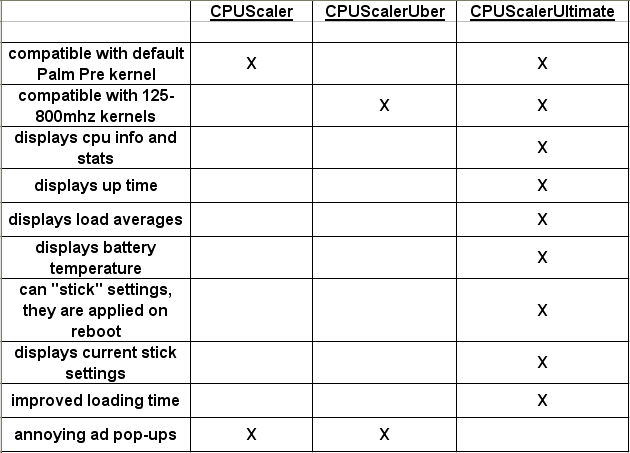
CPUScaler 1.1.1 – for use with the regular Palm Pre kernel capable of 125-600mhz
and
CPUScalerUber 1.1.1 – for use with kernels capable of 125-800mhz
and
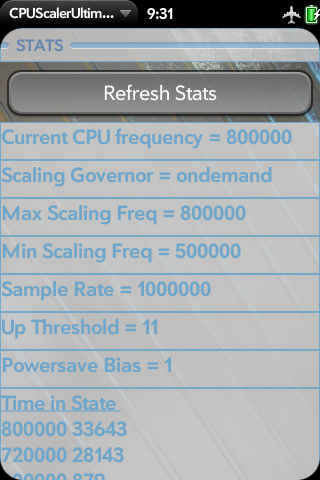
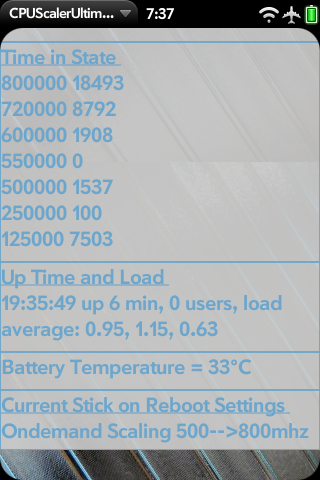
CPUScalerUltimate 2.1.2 – for use with the regular Palm Pre kernel and/or kernels capable of 125-800mhz. It also displays cpu info, up time, load averages, battery temperature, and current stick settings. It can make your current cpu settings “stick” on reboot.
***If you enjoy this product, think about making a donation. ###This product will not work completely without a compatible kernel installed (see near bottom of page for list of compatible kernels).
Please read this entire post before installing!!!
Running your phone at very high or very low frequencies may cause problems with your phone. You have been warned. I am not responsible for anything that happens to your phone or anything your phone is/was affecting. Use at your own risk.
To install the new version you must uninstall the old CPUScaler app and its service with WOSQI or Preware!! Then you can download and install the new CPUScaler app and its service with WOSQI or Preware.
You must have a compatible kernel installed for the version of CPUScaler that you are using for the app to perform properly
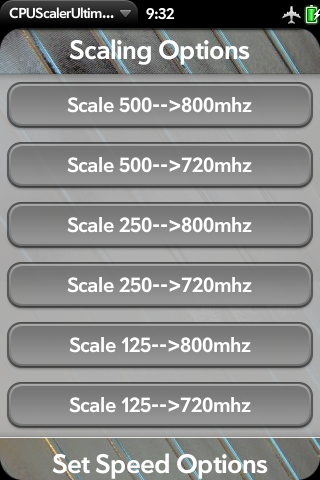
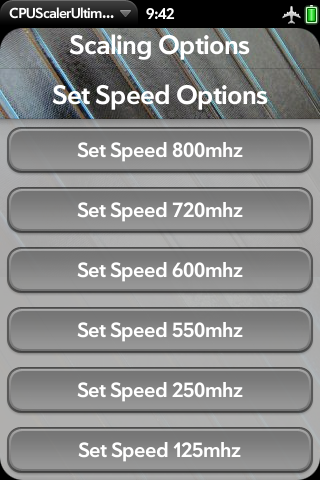
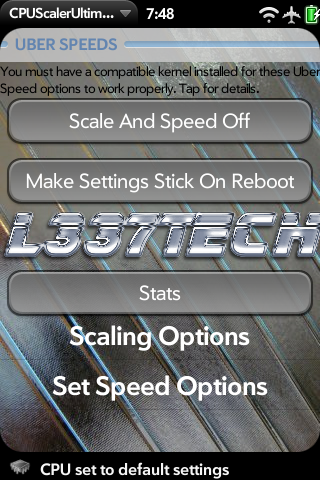
This app was developed to give a Palm Pre user the ability to turn cpu scaling on and off with the touch of a button, and changes are made on the fly. The latest version also allows the user to set the cpu to a constant speed of their choosing. There are also other scaling options now if you don’t want to use the standard 500–>600mhz.
This app is only for the Palm PRE! This does not work on the palm PIXIE!
To install you have to you WOSQI (webos quick install) or Preware. To completely uninstall you have to use WOSQI or Preware!
It is very important that you remove all cpu effecting patches or code before you install any version of CPUScaler. This includes any scaling, luna setting, userspace, or smart reflex patches or scripts. Some other patches have demonstrated conflicts.
First lets talk about how to install the app. You need to download two ipk files. The cpuscaler service and the cpuscaler app. Here are the links to each:
You can use Preware for the free “Lite Versions” by copy and pasting:
http://www.l337tech.com/webos/apps
into Preware and call it “L337Tech.com-webos-free”.
CPUScaler 1.1.1 – for use with the regular Palm Pre kernel capable of 125-600mhz
com.l337tech.cpuscaler_1.1.2_all.ipk
com.l337tech.cpuscalerapp_1.1.1_all.ipk
CPUScalerUber 1.1.1 – for use with kernels capable of 125-800mhz
com.l337tech.cpuscaleruber_1.1.1_all.ipk
com.l337tech.cpuscalerappuber_1.1.1_all.ipk
CPUScalerUltimate 2.1.2 – for use with the regular Palm Pre kernel and/or kernels capable of 125-800mhz. It also displays cpu info, up time, and load averages.
***If you enjoy this product, think about making a donation. ###This product will not work completely without a compatible kernel installed (see bottom of post for list of compatible kernels).
CPUScalerUltimate Download Page
Now you need to make sure you have the latest version of WOSQI and WebOS Doctor in the same folder together. Open WOSQI and add the two ipk files you just downloaded to the install queue. Now hit install and accept the statement about l337tech requesting access to run a script. The script is just a post install script to move the cpu scaler service to the correct folder. Now you should have everything you need installed and ready to go. Alternatively you can now use Preware. The free “Lite Versions” are available by a custom feed mentioned above and the CPUScalerUltimate version is available on a private custom feed supplied on purchase. Once the custom Preware feed has been added, installation is as easy as clicking on the packaged you want installed. Preware will also alert you if you need to update any versions of CPUScaler that you have on your Pre. Simply hit the update button to upgrade to the latest version.
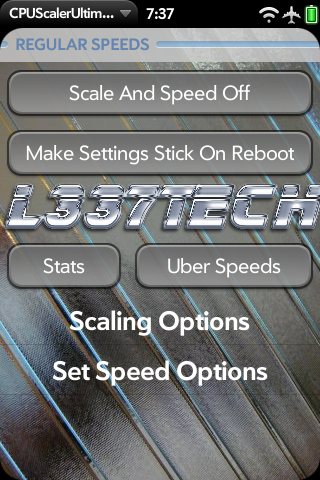
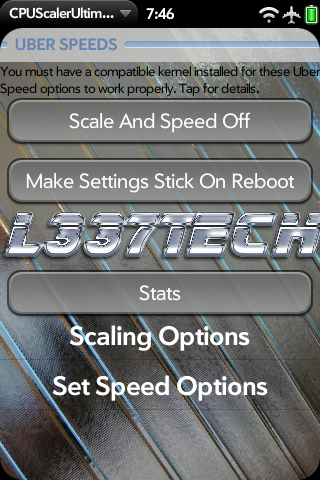
To use the app simply open it up and select an option by pressing won of the buttons. You will know if the button worked if you a notification at the bottom of the screen pop up. If you have CPUScalerUltimate, navigate to the stats page and verify that the settings you selected were applied. If you have any other version of CPUScaler you can use the “Set Speed 250mhz” or “Set Speed 125mhz” and see if scrolling around is uber slow. Now you can go ahead and close the app and your cpu will be scaling (or not scaling) until you reboot or shutdown your phone. If you ever reboot your phone will go back to default processor settings so you will need to open the app back up and hit scale on again. If you have the CPUScalerUltimate version and hit the “Make Settings Stick On Reboot” button then the settings that you “stuck” will be applied at reboot. To turn stick settings off just hit the “Scale And Speed Off” button. If you choose to a “Set Speed” option the speed will remain constant until you reboot or enter/exit a application developed with the SDK (typically 3D games). You will want to re enable the desired “Set Speed” option once you exit the SDK app.
To uninstall the app and its service completely you have to use WOSQI or Preware. Simply go to device management in WOSQI and select CPUScaler and an service called “Service to scale the cpu”. Now that the two apps are selected hit uninstall. CPUScaler and its service should be completely removed from your device now. For Preware, navigate to installed packages and look for CPUScaler and its service. Click them and hit remove.
New features and abilities have been added. Currently it still has the recommended setting for cpu scaling that is disused in detail in this thread. But basically it changes some parameters in the kernel to get it to scale from 500-600mhz depending on the load. See the end of the article for the exact commands used for the “scale 500–>600mhz” setting. The set speed options simply uses the userspace scaling governor to set the cpu at a speed and keep it there till you tell it otherwise or enter/exit an SDK developed application (Palm uses the userspace scaling governor default).
I, Casey Broome, or L337tech.com are not responsible for any damage this app could or may cause to your phone or anything your phone is or may effect. This app should only be used by people that understand the risk of running the cpu beyond its default settings. It is true that Palm sets the cpu to 600mhz during PDK gameplay (usually 3D games), but Palm also sets the processor back to 500mhz when you quit the game.
To upgrade you CPUScaling app to the latest version you must uninstall the old app and service first! Then you can download and install the latest version.
I just want to reiterate that if anything goes wrong once you hit one of the scaling or set speed option buttons simply restart, shutdown, or pull the battery. You phone will go back to default settings.
The TI cortexA8 processor in your phones is rated to run at 600mhz but an early batch of processors were “bad” and degraded rapidly when set to 600mhz or higher. This caused Palm to down clock all the Pre’s even though many people have a “good” processor that are more than capable of long term 600mhz use. This can be seen with the people that have tried scaling before. Some people’s phone love it and never have one problem. Other people have problems such as random reboots and hangs when using a scaling patch.
If you appreciated any of my help, enjoy any of my apps that I give away for free, or want to see more development from me, think about making a donation. Thanks!
Acknowledgments:
I would like to give my thanks to DrewPre for the great help creating and compiling the java service, and rwitby from WebOS Internals for help packaging up the java service. I would also like to thank unixpsycho and caj2008 from precentral forums for creating an amazing kernel that allows the pre to run at speeds between 125-800mhz. CPUScalerUber would not be possible with out it. I have donated to DrewPre and rwitby for their help.
Code used for “scale on”:
echo ondemand > /sys/devices/system/cpu/cpu0/cpufreq/scaling_governor
echo 600000 > /sys/devices/system/cpu/cpu0/cpufreq/scaling_max_freq
echo 500000 > /sys/devices/system/cpu/cpu0/cpufreq/scaling_min_freq
echo 11 > /sys/devices/system/cpu/cpu0/cpufreq/ondemand/up_threshold
echo 1000000 > /sys/devices/system/cpu/cpu0/cpufreq/ondemand/sampling_rate
echo 1 > /sys/devices/system/cpu/cpu0/cpufreq/ondemand/powersave_bias
Good luck everyone and happy scaling!
number1pete
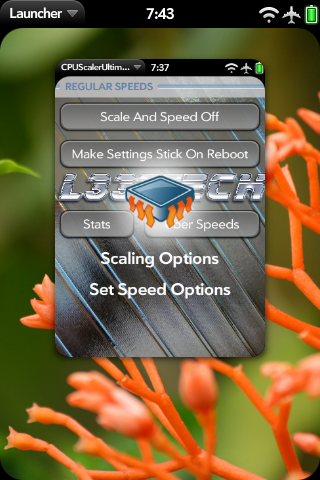
CPUScalerUltimate version 2.1.2 added features:
-added cpu temperature support if you are using webos internals uber-kernel
-added new refresh stats button for easier stats refreshing
CPUScalerUltimate version 2.1.0 added features:
-you can choose to “stick” your current cpu settings so they are applied at reboot
-displays current stick setting on the stats page
-displays battery temperature on the stats page
CPUScalerUltimate version 2.0.0 features:
-works with any kernel (some features are dependent on certain kernels)
-displays lots of cpu info
-displays up time and load averages
-quicker loading of app
-cleaned up UI
-no annoying ad pop-ups
CPUScaler version 1.1.1 features:
-added notifications to notify the user when the cpu has been scaled or set speed
-cleaned up the UI, scaling and set speed option now have their own drawer
-changed the code in the cpuscaler service to utilize my new parameters that fix the issues of scaling going out of the range of the min and max scaling frequency
-fix preware install problem for the service
com.l337tech.cpuscaler_1.1.2_all.ipk
com.l337tech.cpuscalerapp_1.1.1_all.ipk
CPUScaler version 1.1.0 features:
-added ability to choose many more scaling options via a “more options” button
-added ability to choose setting the cpu to a constant speed (using userspace governor)
-added many constant speeds that you can set the cpu to
-added ability scroll the app
-fixed problem where app did not reset all the cpu setings back to default when you hit “Scale and Speed off”
-fixed problem where app rotated in landscape mode
-added custom splash screen
-added ability to hide the more speed and scaling options via “more options” button
-changed the up_threshold to 11% to keep the CPU scaled during phone calls
com.l337tech.cpuscaler_1.1.0_all.ipk
com.l337tech.cpuscalerapp_1.1.0_all.ipk
CPUScaler version 1.0.0 features:
-turn cpu scaling on with a button (500–>600mhz scaling)
-turn cpu scaling off with a button (resets cpu settings to Palm default)
com.l337tech.cpuscaler_1.0.0_all.ipk
com.l337tech.cpuscalerapp_1.0.0_all.ipk
——————————-
Compatible kernels for CPUScaler
1. Palm Pre default kernel in WebOS 1.4.1
——————————-
Compatible kernels for CPUScalerUber
For options that operate between 125mhz and 600mhz these kernels are compatible:
1. Palm Pre default kernel in WebOS 1.4.1
2. Custom 125–800mhz kernel customized by Unixpsycho and Caj2008, see this thread. Caj2008 has performed extensive alpha testing on this kernel.
For options that operate between 125mhz and 800mhz these kernels are compatible:
1. Custom 125–800mhz kernel customized by Unixpsycho and Caj2008, see this thread. Caj2008 has performed extensive alpha testing on this kernel.
——————————–
———————————————————————————–
###List of compatible kernels for CPUScalerUltimate
For options that operate between 125mhz and 600mhz these kernels are compatible:
1. Palm Pre default kernel in WebOS 1.4.1
2. Custom 125–800mhz kernel customized by Unixpsycho and Caj2008, download from this thread. Caj2008 has performed extensive alpha testing on this kernel.
For options that operate between 125mhz and 800mhz these kernels are compatible:
1. Custom 125–800mhz kernel customized by Unixpsycho and Caj2008, see this thread. Caj2008 has performed extensive alpha testing on this kernel.
A kernel built by unixpsycho/caj2008 and packaged by L337tech into an easy install ipk for WebOS 1.4.0 and 1.4.1 is supplied via download page with purchase of CPUScalerUltimate (look for it in the install instructions)..
————————————————————————————
***Terms of Purchase
By clicking on the “buy now” paypal link you have agreed to these terms of purchase. When purchasing an item on this page, you are buying the product it refers to “as is”. The product that a “buy now” paypal link is referring to is typically found directly above. You are not buying future versions of the product. The product is not guaranteed to be updated. The product is not guaranteed to work with future versions of WebOS or future versions of the Palm Pre. This product might never be updated. You can download any product found on the download page including future versions of the product if you bought a previous version of the product. You agree to keep the download link and download page confidential. Sharing this information or downloading without purchase can lead to legal action. This product will not work completely without a compatible kernel installed. You are not buying or may never recieve support for this product. Installation and proper functionality is not guaranteed. This product may not work with your Palm Pre in its current configuration. This product changes all the time. I, Casey Broome, or L337tech.com are not responsible for any damage this app could or may cause to your phone or anything your phone is or may effect. This app should only be used by people that understand the risk of running the cpu beyond or below its default settings. Information about this product found on this page or other pages managed by myself may not depict the product exactly in its current state.
Posted in apps
Tags: app, application, bias, cpu, hack, ondemand, palm, pixie, powersave, pre, scale, smartflex, webos